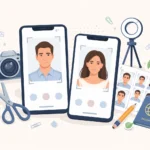
When applying for a US passport, one of the most crucial steps is providing a passport photo that meets specific guidelines. If your photo doesn’t meet the required specifications, it could lead to delays or even rejection of your application. The US passport photo size is essential to ensure smooth processing and avoid any unnecessary hassles.
Why Correct Passport Photo Size Matters
Passport photos are a crucial part of the application process, and they must meet the strict standards set by the U.S. Department of State. The U.S. government requires passport photos to adhere to precise dimensions and specifications. If your photo doesn’t match these guidelines, it could result in delays or even rejection of your application. This can be extremely frustrating, especially if you’re planning to travel soon and need your passport promptly. Resubmitting your photo, waiting for processing, and dealing with administrative issues can cause unwanted stress and waste precious time. Understanding the requirements upfront ensures that your photo will meet expectations and avoid costly mistakes.
The Importance of Avoiding Rejection
The significance of submitting the correct passport photo goes beyond just following government instructions; it’s about ensuring that your passport application is processed without unnecessary hiccups. If your photo is rejected, you’ll face delays in receiving your passport, which can be particularly problematic if you’re on a tight timeline or preparing for an urgent trip. Passport processing times can vary, but a rejected photo can add days or even weeks to the overall process. Rejection not only delays your application, but it can also set you back financially, especially if you need to retake the photo and pay for additional services.
In addition, a rejected passport photo could lead to complications in future travels. A delayed passport can disrupt flight plans, visa applications, or other travel arrangements that depend on timely document processing. To avoid these disruptions, it’s crucial to carefully follow all guidelines provided by the U.S. Department of State. A passport photo that adheres to the right specifications is a key element in a smooth and hassle-free application process. By taking the necessary steps to get it right from the start, you increase the likelihood of a successful application, allowing you to focus on your travel plans without worrying about administrative roadblocks.
US Passport Photo Specifications
When applying for a U.S. passport, one of the most important elements to consider is your passport photo. The photo must comply with a series of specifications outlined by the U.S. Department of State to ensure that it meets the necessary security and identification requirements. A passport photo that doesn’t meet these guidelines could result in a delay or rejection of your application, so it’s crucial to understand the details of the photo specifications.
The specifications are not only about the size of the photo but also the composition and quality of the image. If any aspect is wrong—whether it’s the size, lighting, background color, or head position—the photo might be deemed unacceptable. Therefore, understanding these requirements in detail is essential to ensure smooth processing of your passport application.
Key specifications to consider:
- The photo size must be exactly 2×2 inches (51x51mm).
- The photo should be in color, not black and white.
- The background should be plain white or off-white.
- The photo should be high quality, with no shadows or reflections.
- You must face the camera directly with a neutral expression.
- Glasses, hats, or other accessories are generally not allowed unless for medical or religious reasons.
Standard Dimensions of a US Passport Photo
The standard size of a U.S. passport photo is 2×2 inches (51x51mm). This is the required size for all passport applications, and it’s one of the first things the U.S. government will check when you submit your application. The passport photo needs to be perfectly square, and both the width and the height must measure exactly 2 inches.
Here are some important points to keep in mind about the size:
- The head in the photo should be sized such that it measures between 1 inch and 1 3/8 inches (25mm to 35mm) from chin to crown.
- The eyes should be positioned between 1 1/8 inches and 1 3/8 inches (28mm to 35mm) from the bottom of the photo.
- If your photo is too large or too small, it may be rejected.
It’s also crucial that the photo is printed on high-quality paper and is free from creases or damages. Even minor distortions in the photo can result in the rejection of your passport application. To avoid this, ensure that you follow all size and quality guidelines precisely.
The Essential 2×2 Inches (51x51mm) Size
The 2×2-inch (51x51mm) size is a non-negotiable requirement for U.S. passport photos. This is the standard size that all passport applicants must use, and if the photo is any larger or smaller, it will be automatically rejected. The measurements are exact, and there is little room for error.
Here’s what you need to know about the 2×2-inch size:
- The photo includes the head and shoulders, and the face typically occupies about 1-1 3/8 inches (25mm to 35mm) from the chin to the top of the crown.
- The dimensions of the photo must be 2 inches by 2 inches, which means the photo should be perfectly square.
- When the photo is printed, make sure the borders are clear and unbroken—any distortion or irregularities in the borders can result in rejection.
If you are unsure about whether your photo meets these size requirements, it’s always a good idea to have it professionally taken at a photo service or review your photo carefully using a ruler or measurement tool. It’s better to take extra precautions than to risk having your passport application delayed.
Head Position and Composition Guidelines
One of the most critical elements of a U.S. passport photo is the head position and composition. Your head should be properly aligned and positioned to ensure that your photo is accepted. The U.S. Department of State requires that the photo is taken in a way that clearly represents your facial features and verifies your identity.
Here’s how to ensure your head position is correct:
- Head centered: Your head must be centered within the photo. It should not tilt or be turned to the side. Your face should be clearly visible, and the image should represent a straightforward view.
- Eyes aligned with the camera: Your eyes should be directly facing the camera, and they should be open. Both eyes should be fully visible, and there should be no shadows obscuring your face.
- Neutral expression: You must maintain a neutral expression with your mouth closed and no visible smile or frown. The expression should be natural, and your face should appear relaxed.
- Head measurement: Your head should take up approximately 1 to 1 3/8 inches (25mm to 35mm) of the total height of the photo. This ensures that your face is appropriately sized and placed within the photo.
The composition must ensure that your face is the focal point of the image, so any hair, clothing, or accessories should not obscure your face. Additionally, the background should be plain, with no patterns or distractions, to keep the attention on your face. Following these head positioning and composition guidelines is essential for ensuring that your photo meets the required standards and avoids rejection.
Common Mistakes to Avoid When Taking a Passport Photo
Taking a U.S. passport photo might seem simple, but many people make small mistakes that lead to rejection of their photo. These errors can cause significant delays in the passport application process. Below are some of the most common mistakes and how to avoid them.
Incorrect Dimensions and Crop Errors
One of the most frequent mistakes when taking a passport photo is not adhering to the required dimensions. The U.S. Department of State specifies that the passport photo must be exactly 2×2 inches (51x51mm). If your photo doesn’t meet these exact dimensions, it will be rejected immediately, and you’ll need to retake it.
Key Issues with Dimensions and Crop:
- Cropping errors: If the photo is cropped incorrectly, such as cutting off part of the head or having excessive background space, the application will be rejected.
- Head size: The head must occupy about 1 to 1 3/8 inches (25mm to 35mm) of the height of the photo. If the head is too large or too small in proportion to the image, the photo will be incorrect.
To ensure your passport photo is accepted:
- Use a ruler or a photo editor tool to check the exact measurements of the image.
- Keep the face centered with enough space around the face but not too much.
- Follow guidelines for head size and position as outlined in passport photo requirements.
Poor Lighting and Shadow Issues
Lighting plays an essential role in passport photo acceptance. Photos that are too dark or too bright, or that contain shadows on the face or background, will be rejected. Ideally, the lighting should be even, with no visible shadows or overexposure, and should highlight your facial features clearly.
Key Lighting and Shadow Issues:
- Shadows on the face: Shadows cast by harsh light can obscure your facial features, especially under the eyes or on the sides of the face.
- Overexposure: Too much light can cause the photo to appear washed out or blurry, making it difficult to see facial details clearly.
To get proper lighting:
- Use soft, diffused natural light, such as positioning yourself near a window, but avoid direct sunlight that may create harsh shadows.
- If you’re indoors, use soft lighting sources like lamps with diffusers or softboxes to avoid direct light that causes shadows or glare.
- Ensure that there is no shadow on your background and that your face is well-lit.
How to Take a Perfect US Passport Photo
Choose the Right Background
Selecting the right background is essential for a perfect passport photo. The background must be a plain white or off-white color—nothing too bright or dark. A clean and neutral background ensures that the focus remains solely on your face, which is critical for identification purposes. A busy or textured background will distract from your facial features and can lead to the rejection of your photo. This is especially important when the photo is being scanned by the U.S. government, as any distractions can interfere with the clarity and accuracy of facial recognition.
To achieve the ideal background, choose a space with a clear wall in a neutral color or use a solid white or off-white sheet as a backdrop. Avoid backgrounds that contain any items, patterns, or textures. Even the smallest detail can make a difference. For example, a patterned shirt or a tree branch in the background can cause issues during the submission process. Ensure there is no shadowing or glare on the background, and that the photo is clean and simple. The simpler the background, the better the focus will be on your face, leading to a higher chance of photo acceptance.
Position Yourself for the Perfect Shot
Positioning yourself correctly is key to taking the perfect U.S. passport photo. To meet the required guidelines, your head should be centered and facing the camera directly. Stand or sit up straight with your face looking directly into the camera lens. Keep your posture relaxed but upright, as slouching or leaning can lead to an unflattering angle or distortion in the photo. It’s important to maintain a neutral facial expression, with your mouth closed and no smiling or frowning. This neutral expression is a requirement for U.S. passport photos to ensure that the image accurately represents your natural facial features.
When positioning yourself, make sure that your head is not tilted in any direction, and your eyes are fully open and visible. Avoid having your head turned slightly or looking down or up, as this can affect the proportions of the photo and may lead to rejection. If you are sitting, ensure that you’re at the right height, so your head is directly in line with the camera. Additionally, your shoulders should be relaxed but not slumped, as this will help maintain a symmetrical and balanced appearance in the photo.
Proper Lighting Tips
Lighting is one of the most critical elements when taking a U.S. passport photo. For the best results, use diffused natural light, ideally from a window. Natural light provides even illumination, reducing the risk of harsh shadows or bright spots on your face. However, if natural light isn’t available, soft artificial lighting can also do the trick. Use a light source that is diffused to avoid casting strong shadows on your face. The light should be evenly distributed, ensuring there are no dark areas or reflections on your face, as well as no overly bright spots or glare. Make sure that the light source is in front of you, not behind, as this could create backlighting that would cause shadows on your face.
Another key consideration is the positioning of the light. The light should be placed slightly above eye level, but not directly overhead. This prevents harsh shadows and makes sure that your face is evenly lit. Avoid using a direct flash, as this can cause reflection or a washed-out effect. A ring light or softbox is ideal, as these tools provide soft, uniform lighting. Make sure that both sides of your face are illuminated without any uneven lighting or shadows, as this will ensure the photo meets the required specifications and has a clear, professional appearance.